 Atlas Documentation
Authentication
How to create an Atlas account, retrieve your API keys, and authenticate API requests.
Atlas authenticates your requests using API keys. To get your API keys, you need to create an account for free on the Atlas sign up page. After sign-up, you will be required to submit compliance documents before you can go live.
Info
You can use Atlas in test mode while your documents are under review. Test mode lets you explore the API without affecting live balances or real payments.
Getting your API keys
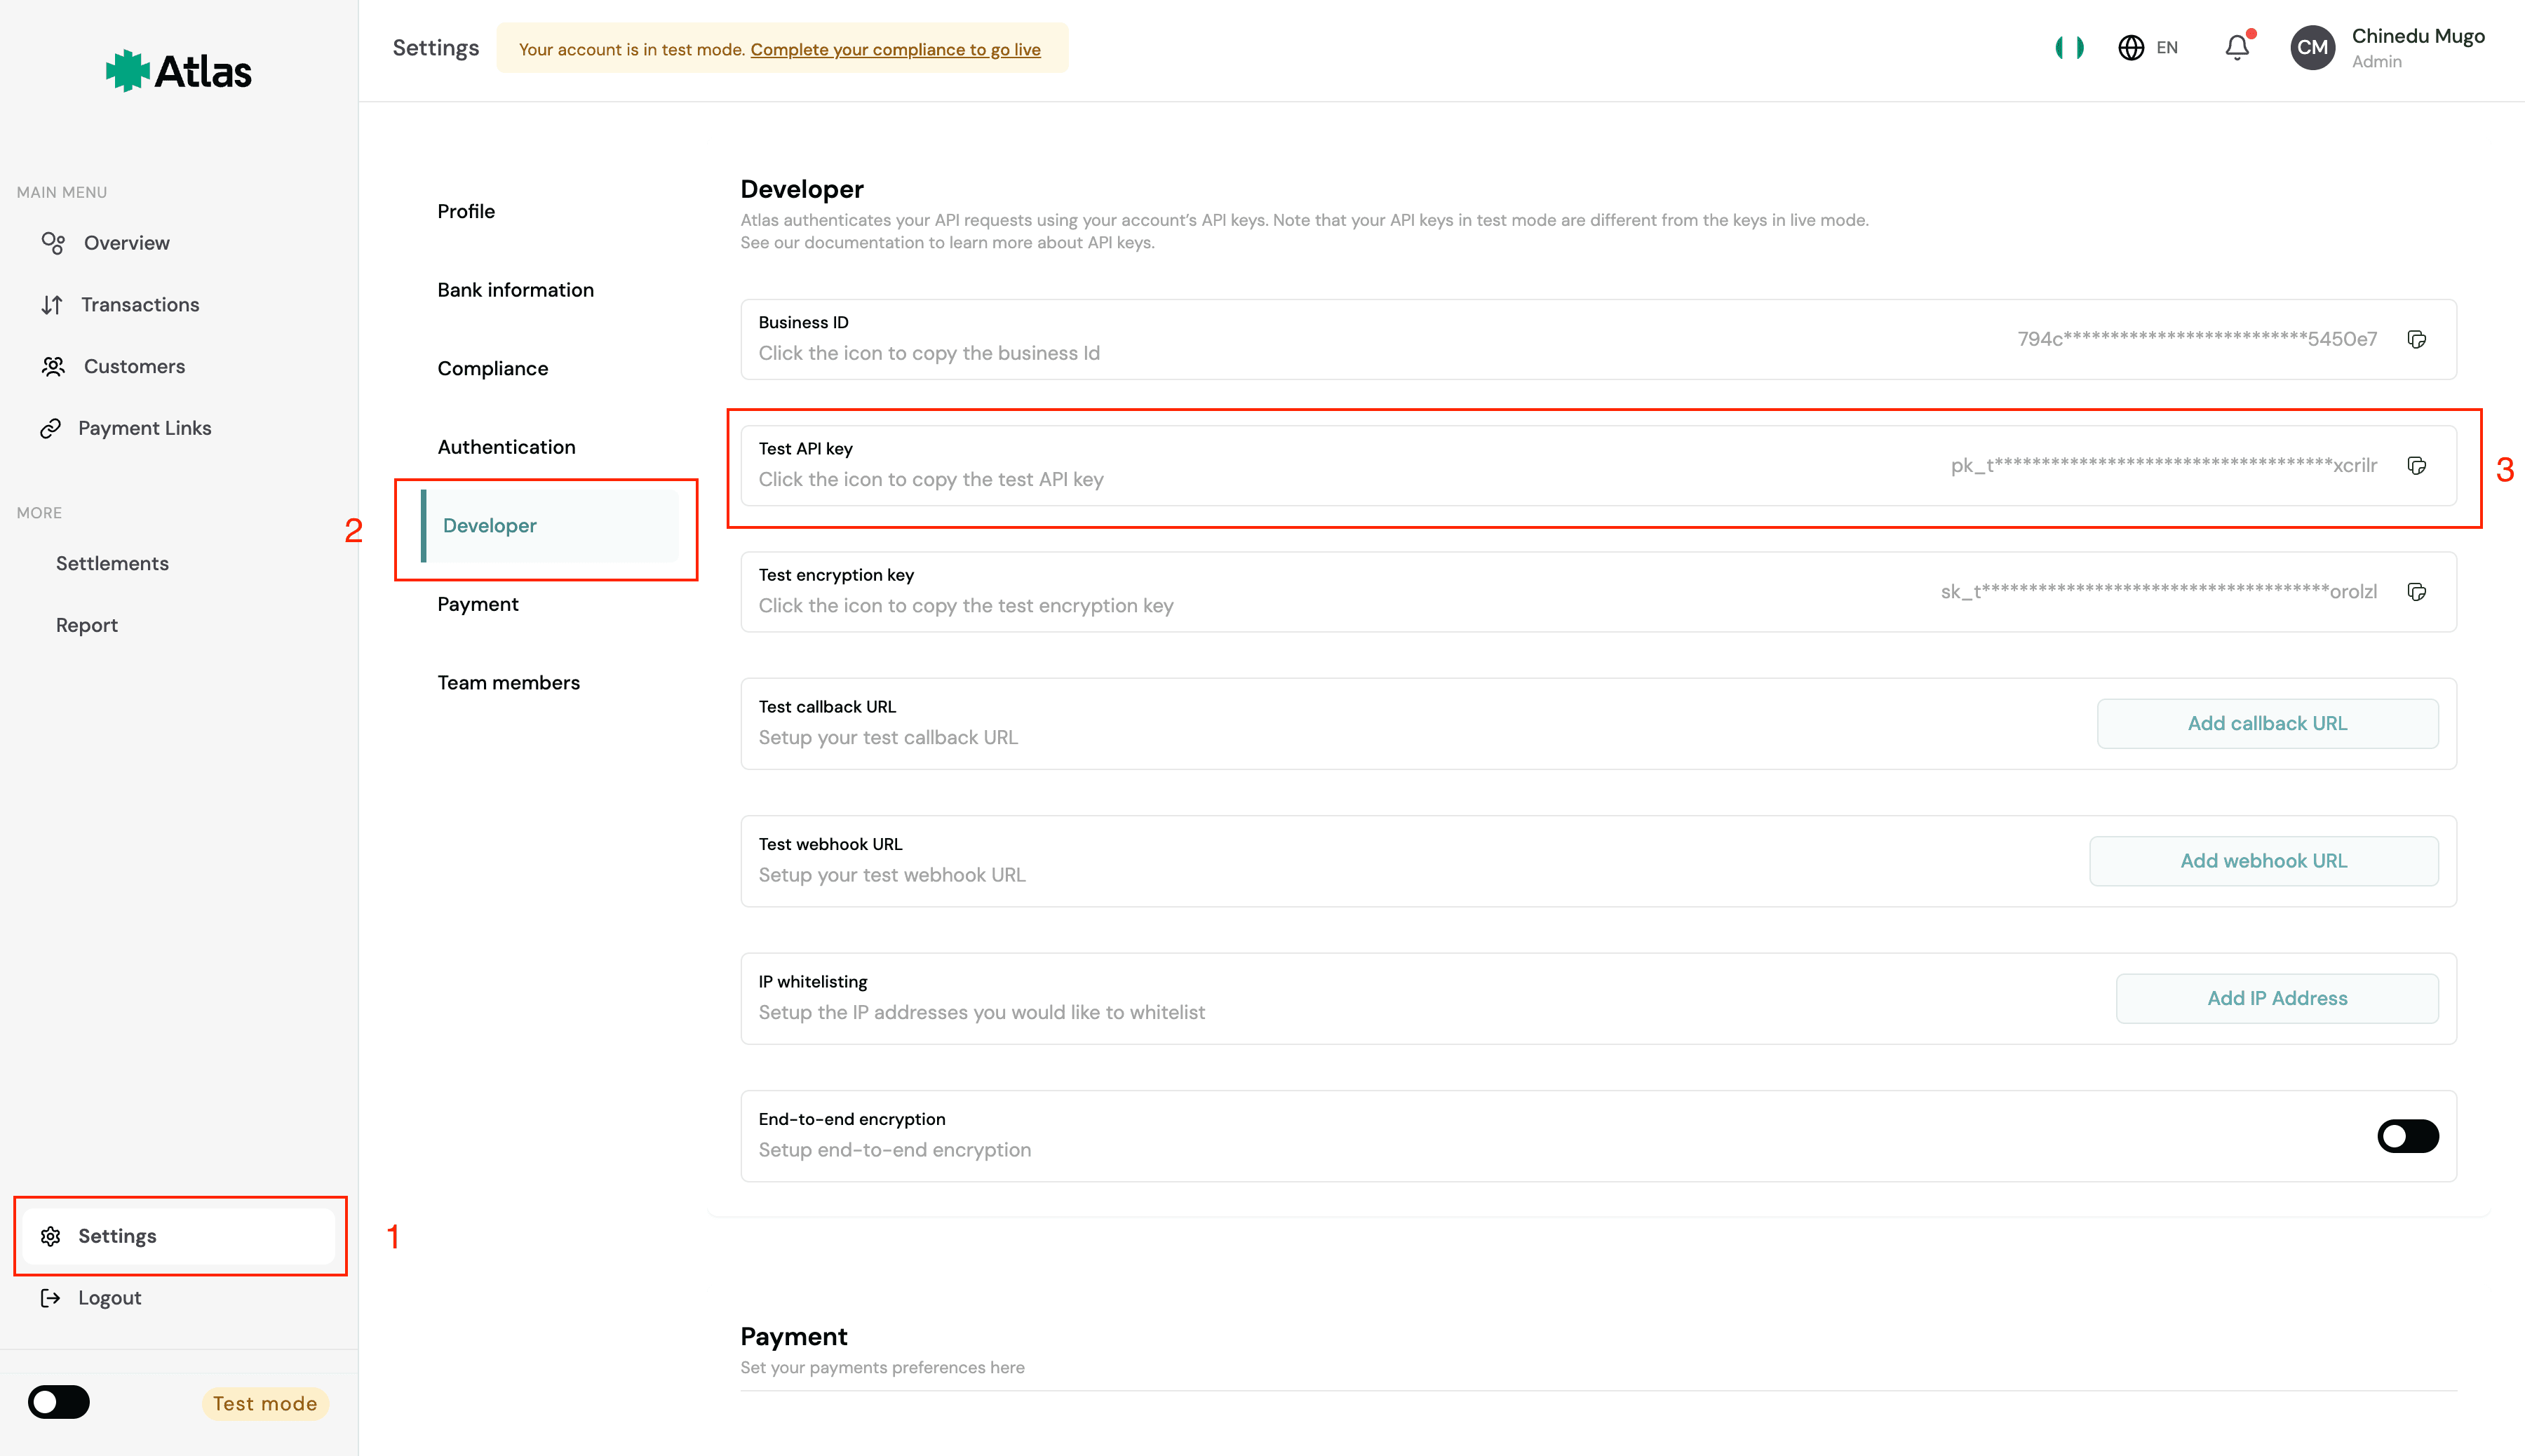
- Log in to the Atlas Dashboard.
- Open Settings → Developer.
- Copy your API keys.
Warning
- Never embed your API key in client-side code or mobile apps.
- Store it in server-side environment variables (for example,
ATLAS_API_KEY). - Use test keys in development and live keys only in production.
Authenticating requests to the API
The Atlas API follows the Representational State Transfer (REST) standard to organize its API. It accepts and returns JSON-encoded data and uses standard HTTP response codes, authentication, and verbs.
The keys shown in your dashboard depend on your account mode. If your account is in test mode, you will see test keys; if it’s in live mode, you will see live keys. Test mode requests don’t affect your live data or interact with the banking networks.
Base URL
The base URL for Atlas is the same for all environments. There is no separate test or production URL, the API key you use determines whether your request runs in test mode or live mode.
The Base URL for all requests is:
https://atlas.tryduplo.com/api/v1
The requests are authenticated using the Bearer Token authentication scheme. For every request you send, you need to include an Authorization header with the value Bearer <YOUR_API_KEY>.
For example:
curl https://atlas.tryduplo.com/api/v1 \
  -H "Authorization: Bearer pk_test_123" \
  -H "Content-Type: application/json" \
  -H "Accept: application/json"
Tip
For added security, we recommend encrypting your request payloads .
Related guides
How is this guide?
Last updated on