 Atlas Documentation
Collect Payments with the UI
Collect payments using the Atlas dashboard without code, including receiving deposits via virtual accounts and creating shareable payment links.
You can collect payments from your customers on Atlas using your Atlas virtual account or Atlas payment links.
Using virtual accounts
After your compliance documents have been approved, Atlas assigns you a virtual account you can share with your customers and receive payments. You can view your virtual account details on the Atlas dashboard when you click the "Add Money" button.
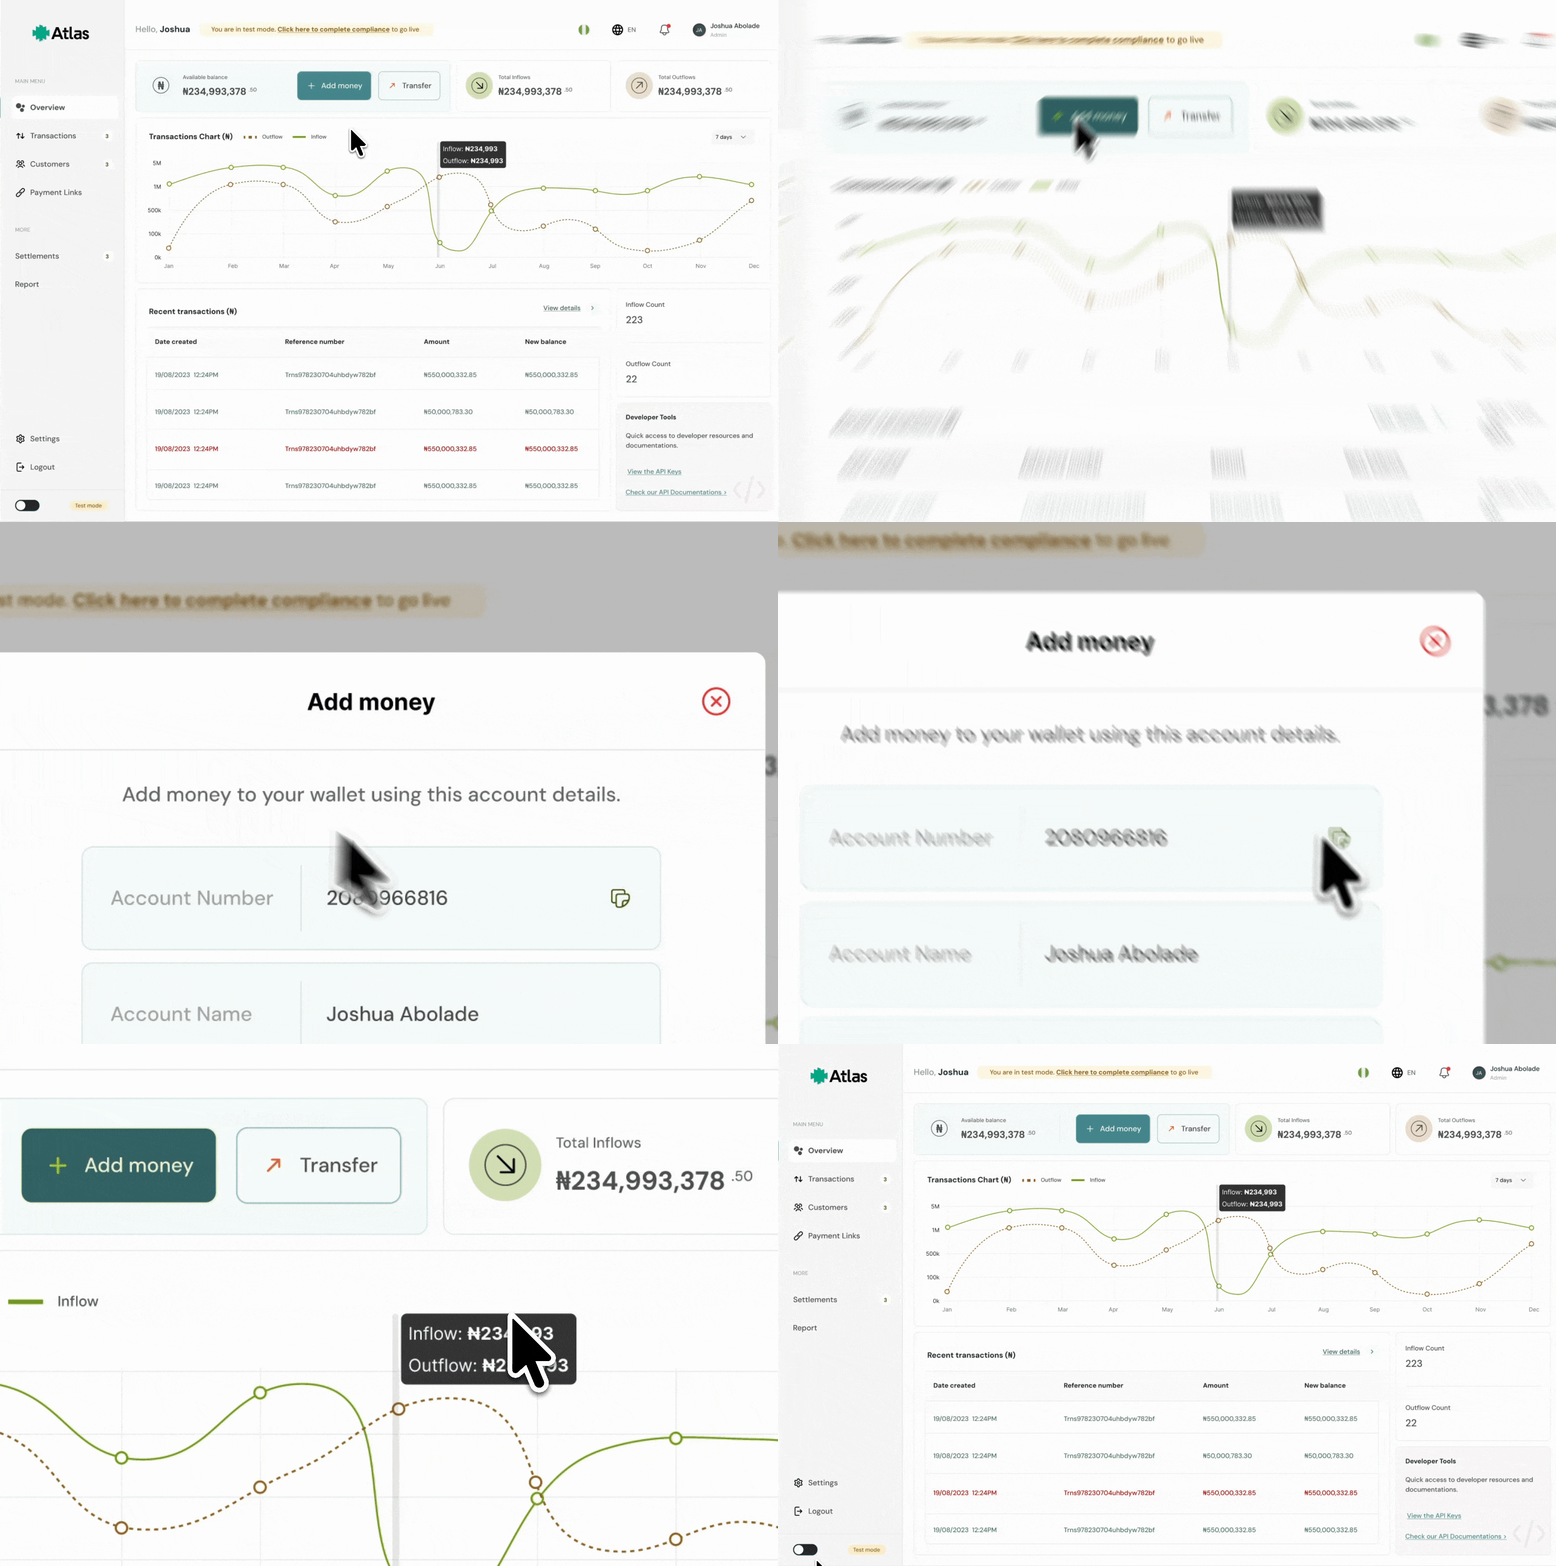
When a customer deposits money to your virtual account, Atlas records it as an inflow and updates your available balance. You’ll see the payment in your dashboard with the amount, time, and reference so you can reconcile it against your customer/order.
Using payment links
Payment links let you accept payments without building a checkout page. Create a reusable link, share it anywhere (email, chat, invoice, website), and Atlas handles the payment flow.
To create a payment link, click "Payment Links" on your dashboard to open the payments links page where you can view all the payment links you have created and their statuses.
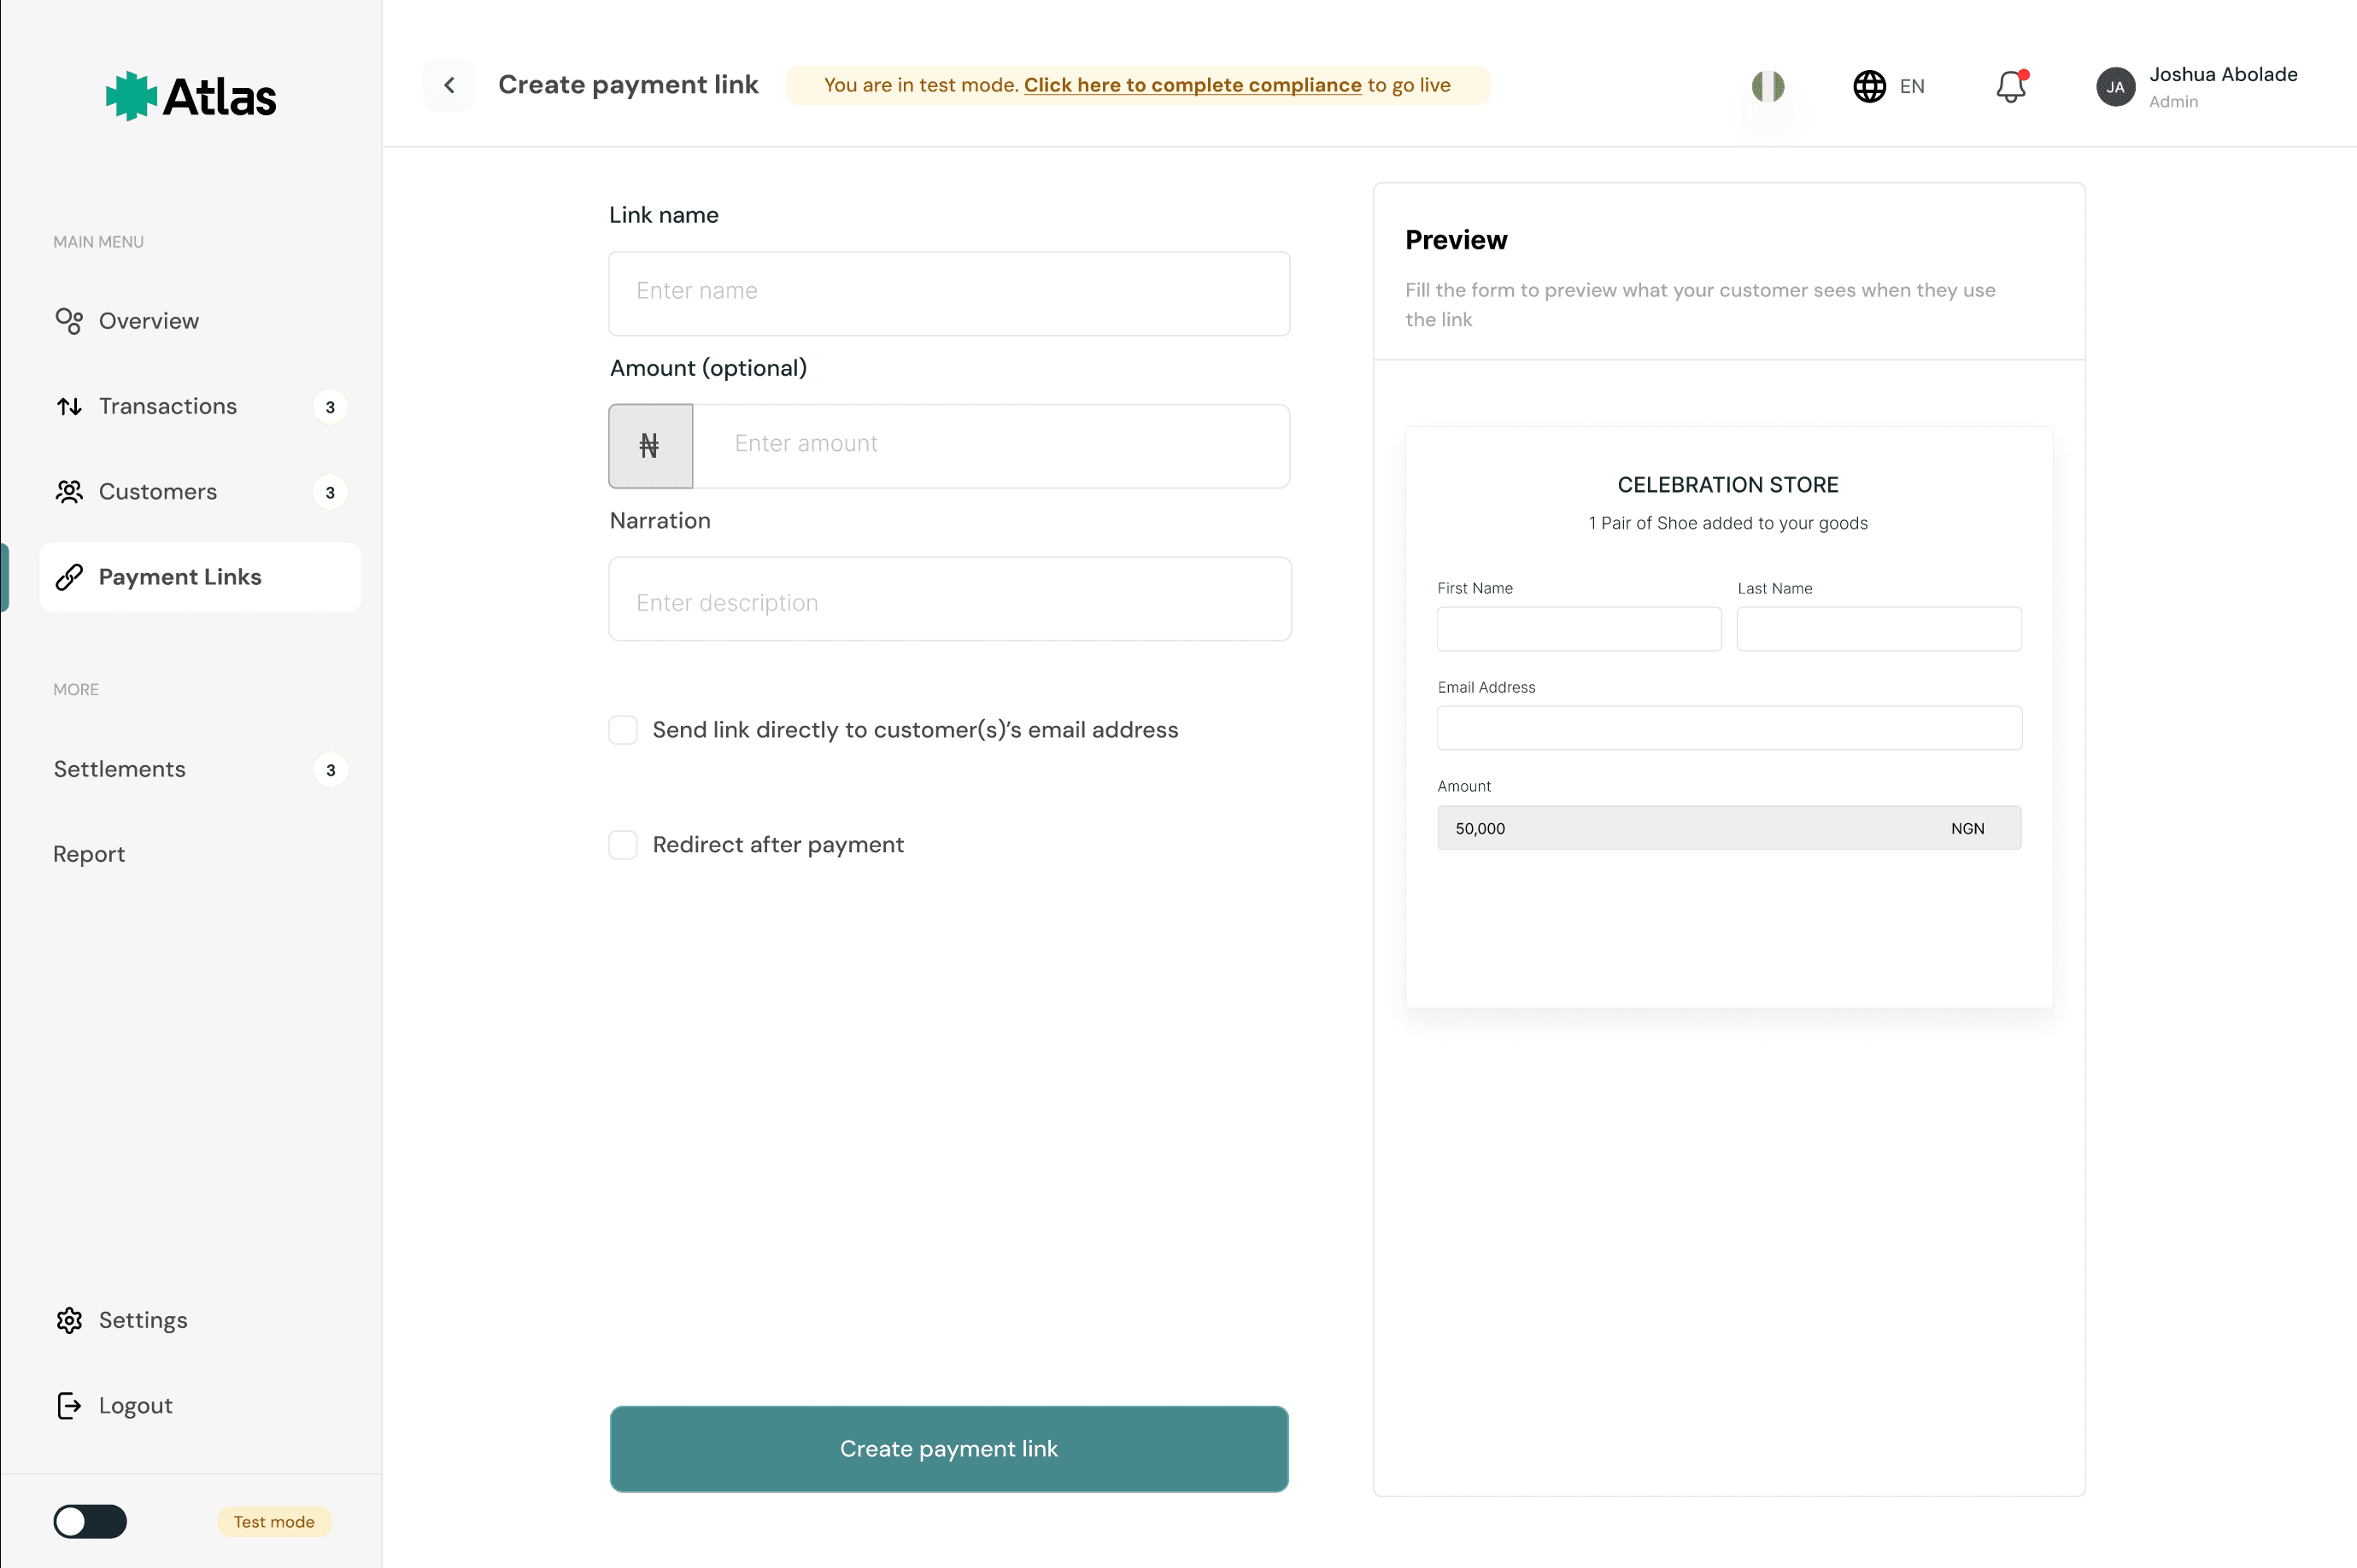
Click the "Create Payment Link" button and fill out the required details: link name and a narration. You can optionally add a specific amount that the payment link can accept (nothing more/less).
Note
Any amount sent to a payment link with an amount that differs from it gets bounced to the payee.
You can also add a customer's email where Atlas forwards the payment link after creation and a redirect URL where Atlas will redirect the user after they complete payment.
How is this guide?
Last updated on
Customers & Virtual Accounts
Create customer records with dedicated virtual accounts via the Atlas API, update customer details, handle virtual account deposits via webhooks, and manage customer blacklisting.
Disbursement Workflow
How outbound payments work on Atlas, covering the payout lifecycle from initiation through validation, processing, and settlement, including payout states (pending, success, failed) and transaction fees.