 Atlas Documentation
Wordpress Plugin
Add Atlas to your wordpress site
The Atlas WordPress plugin lets you accept payments on your WooCommerce store without writing any code. Once installed and connected to your Atlas account, it adds Atlas as a payment method at checkout, so your customers can pay using the same funding rails available through the Atlas API.
The plugin requires a WordPress site running WooCommerce. This guide walks you through installing the plugin, connecting it to your Atlas account with your API keys, and configuring how payments are collected on your store.
Prerequisites
Before you begin, make sure you have:
- A WordPress site running WooCommerce.
- Minimum versions: WordPress
5.1.1or higher, WooCommerce3.6.1or higher, and PHP7.2.2or higher. - An Atlas account and your API key. You can find it on your developer dashboard.
Info
You can install and test the plugin in test mode before your account goes live. Test mode payments do not affect your live balance or move real money.
Install the plugin
You can install Duplo Checkout for WordPress by uploading the plugin file.
Download the latest Duplo Checkout for WordPress .zip from repository.
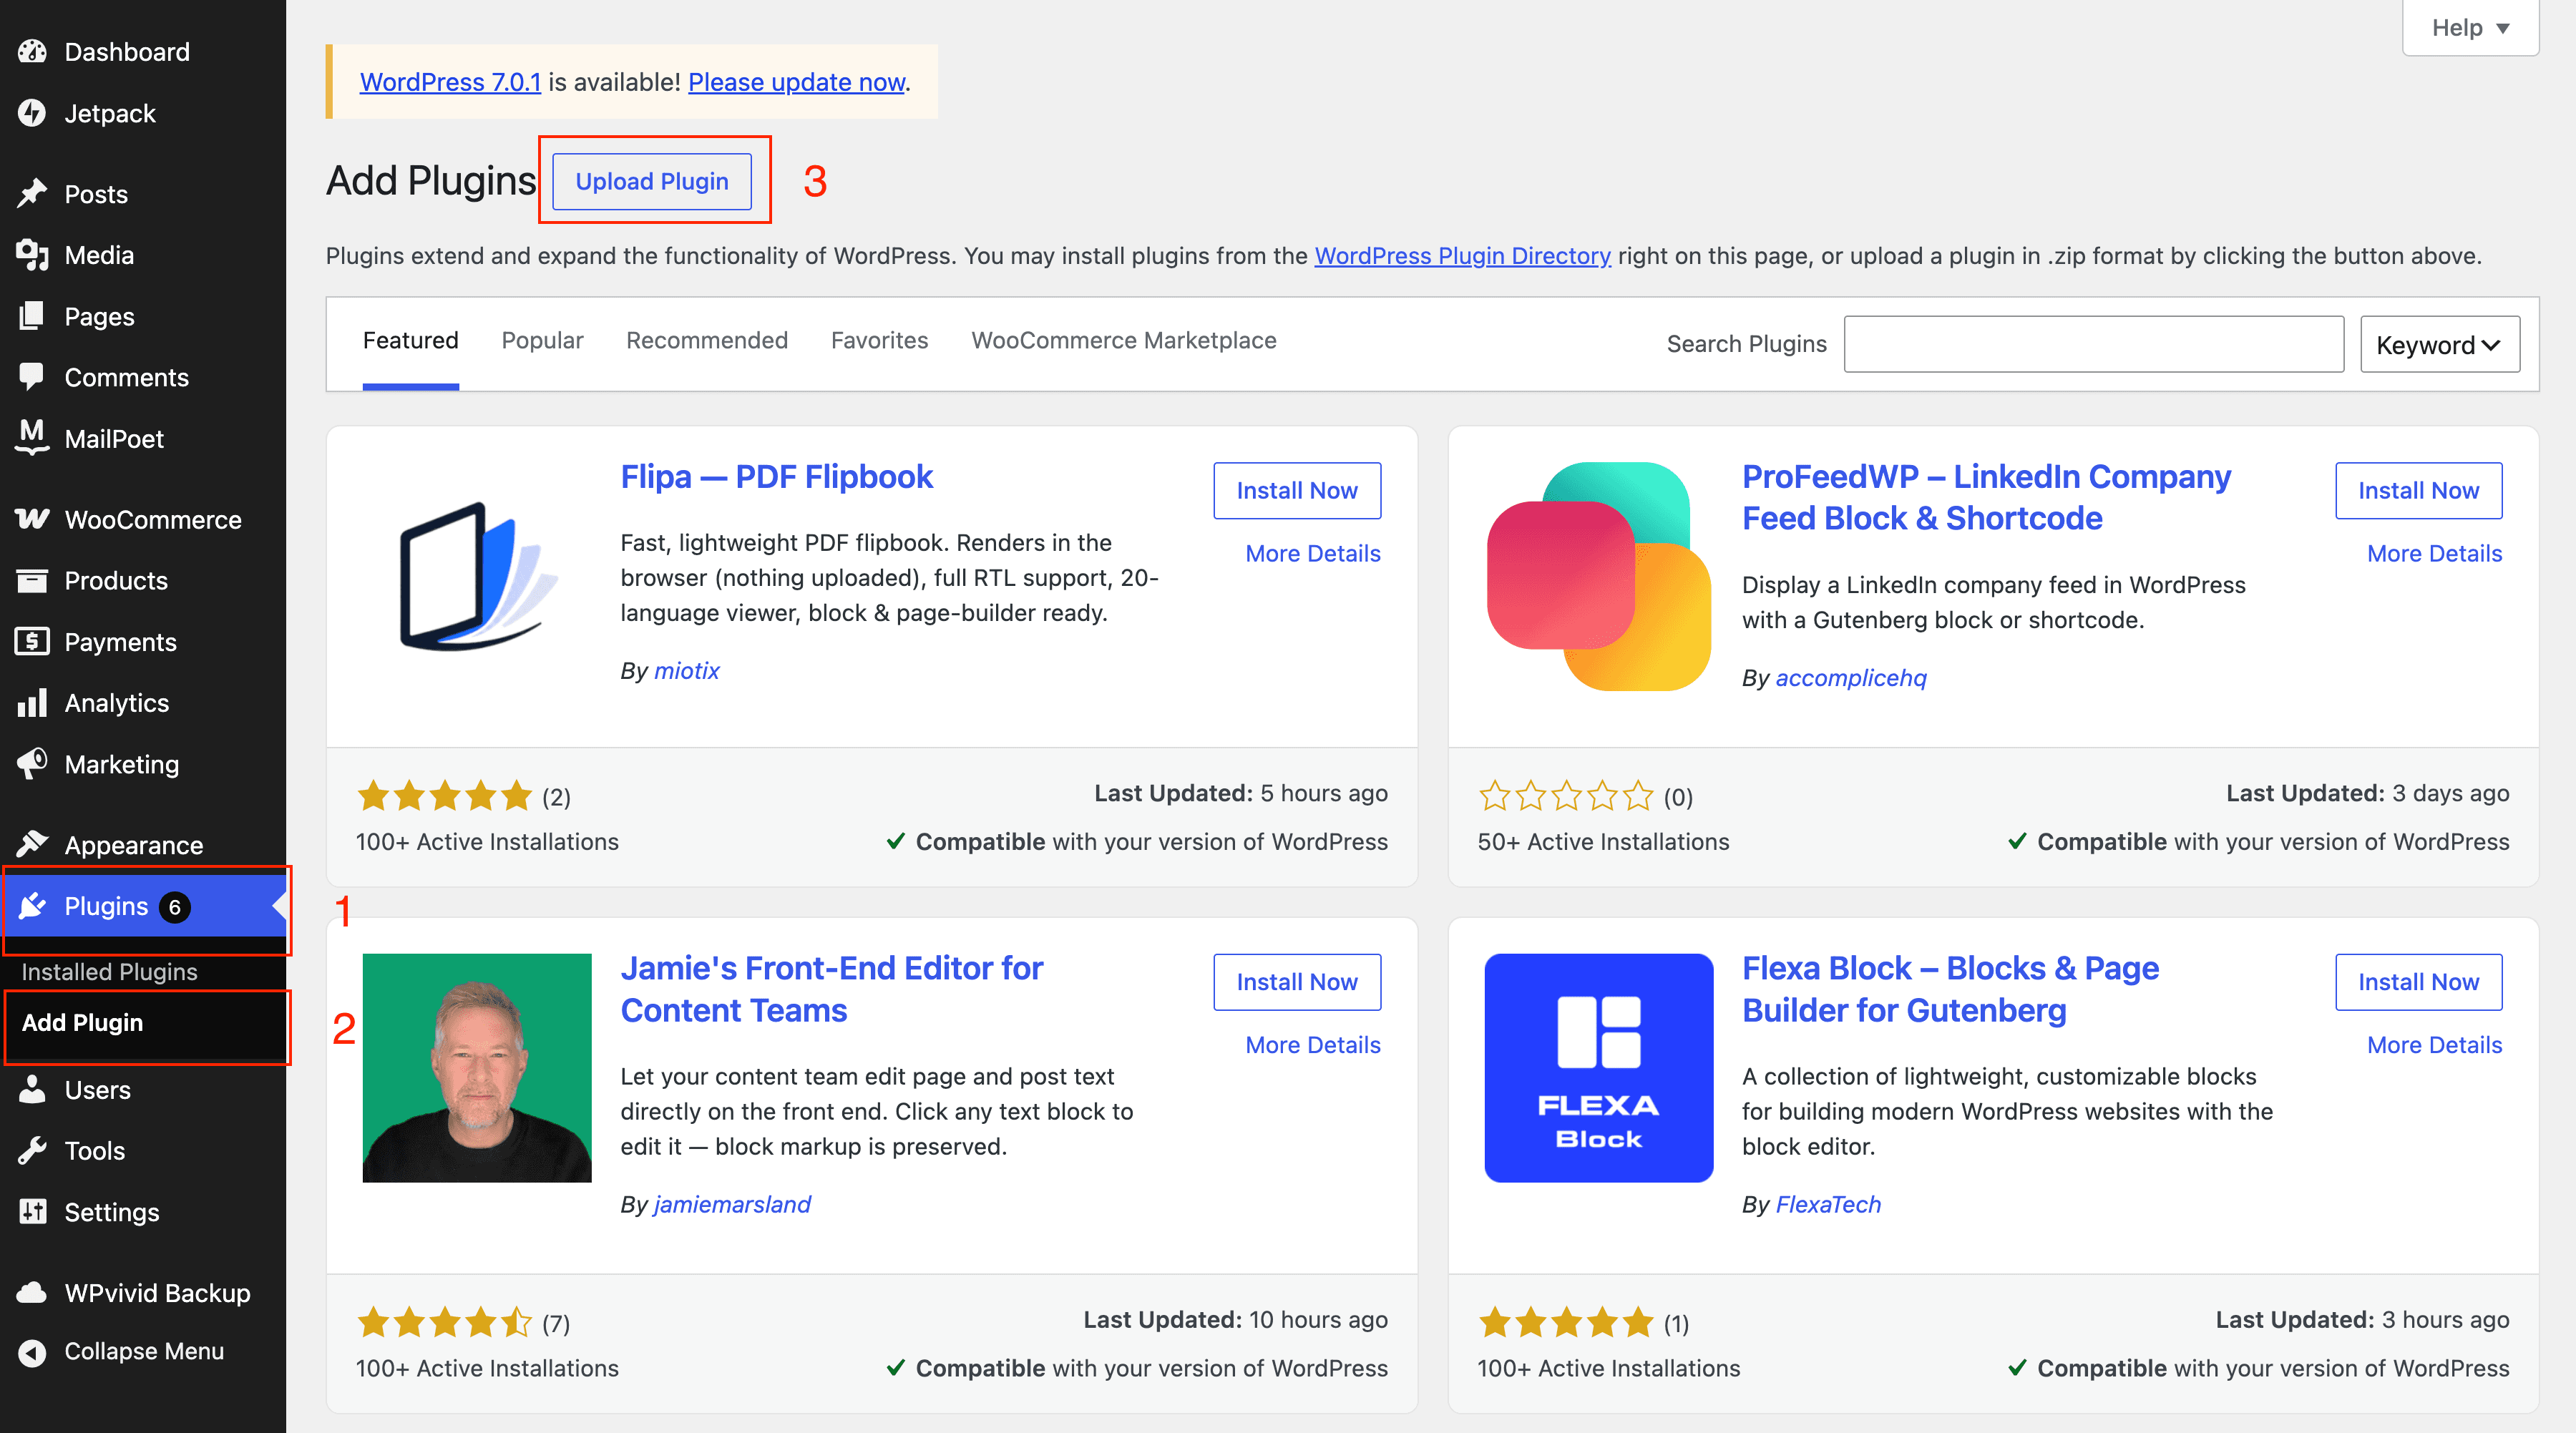
In your WordPress admin, go to Plugins → Add New → Upload Plugin. This installs a plugin from a file instead of the directory.
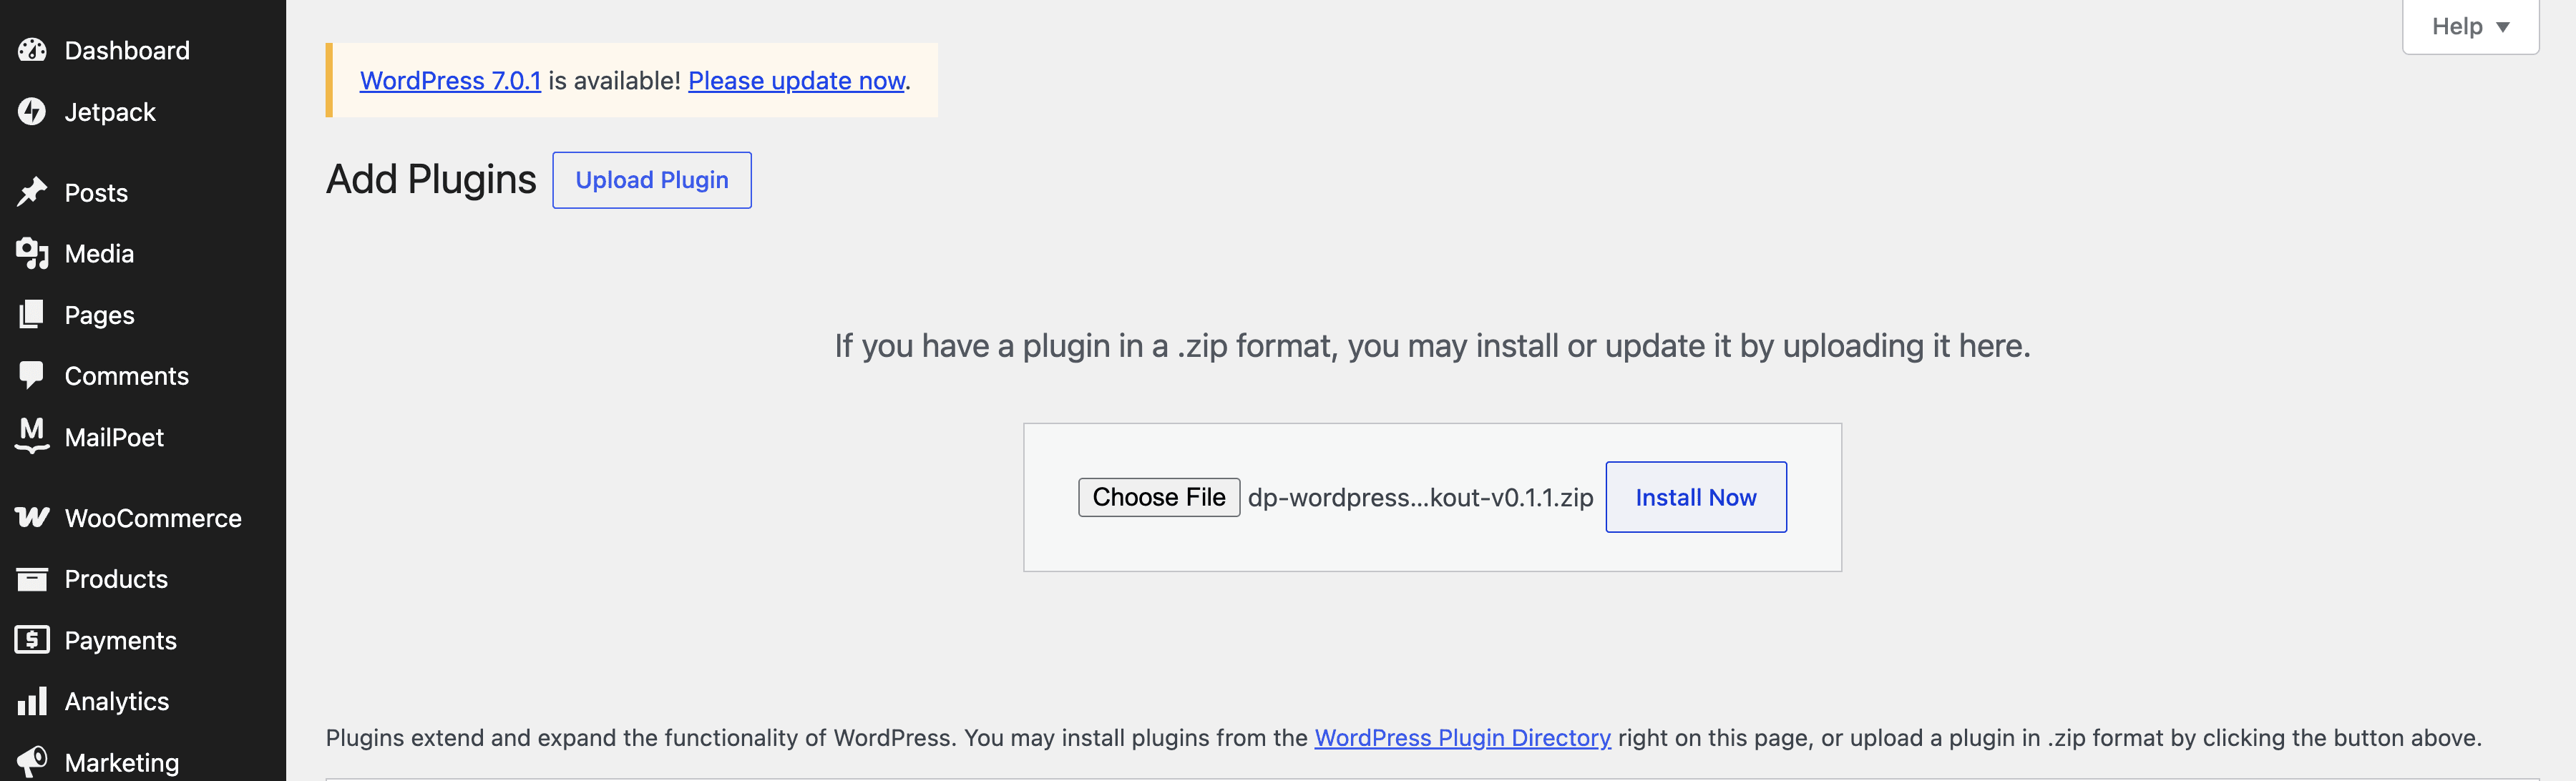
Choose the .zip file, click Install Now, then Activate. Activation registers Duplo as a WooCommerce payment gateway so it can appear at checkout.
Connect to your Atlas account
After activating the plugin, connect it to Atlas:
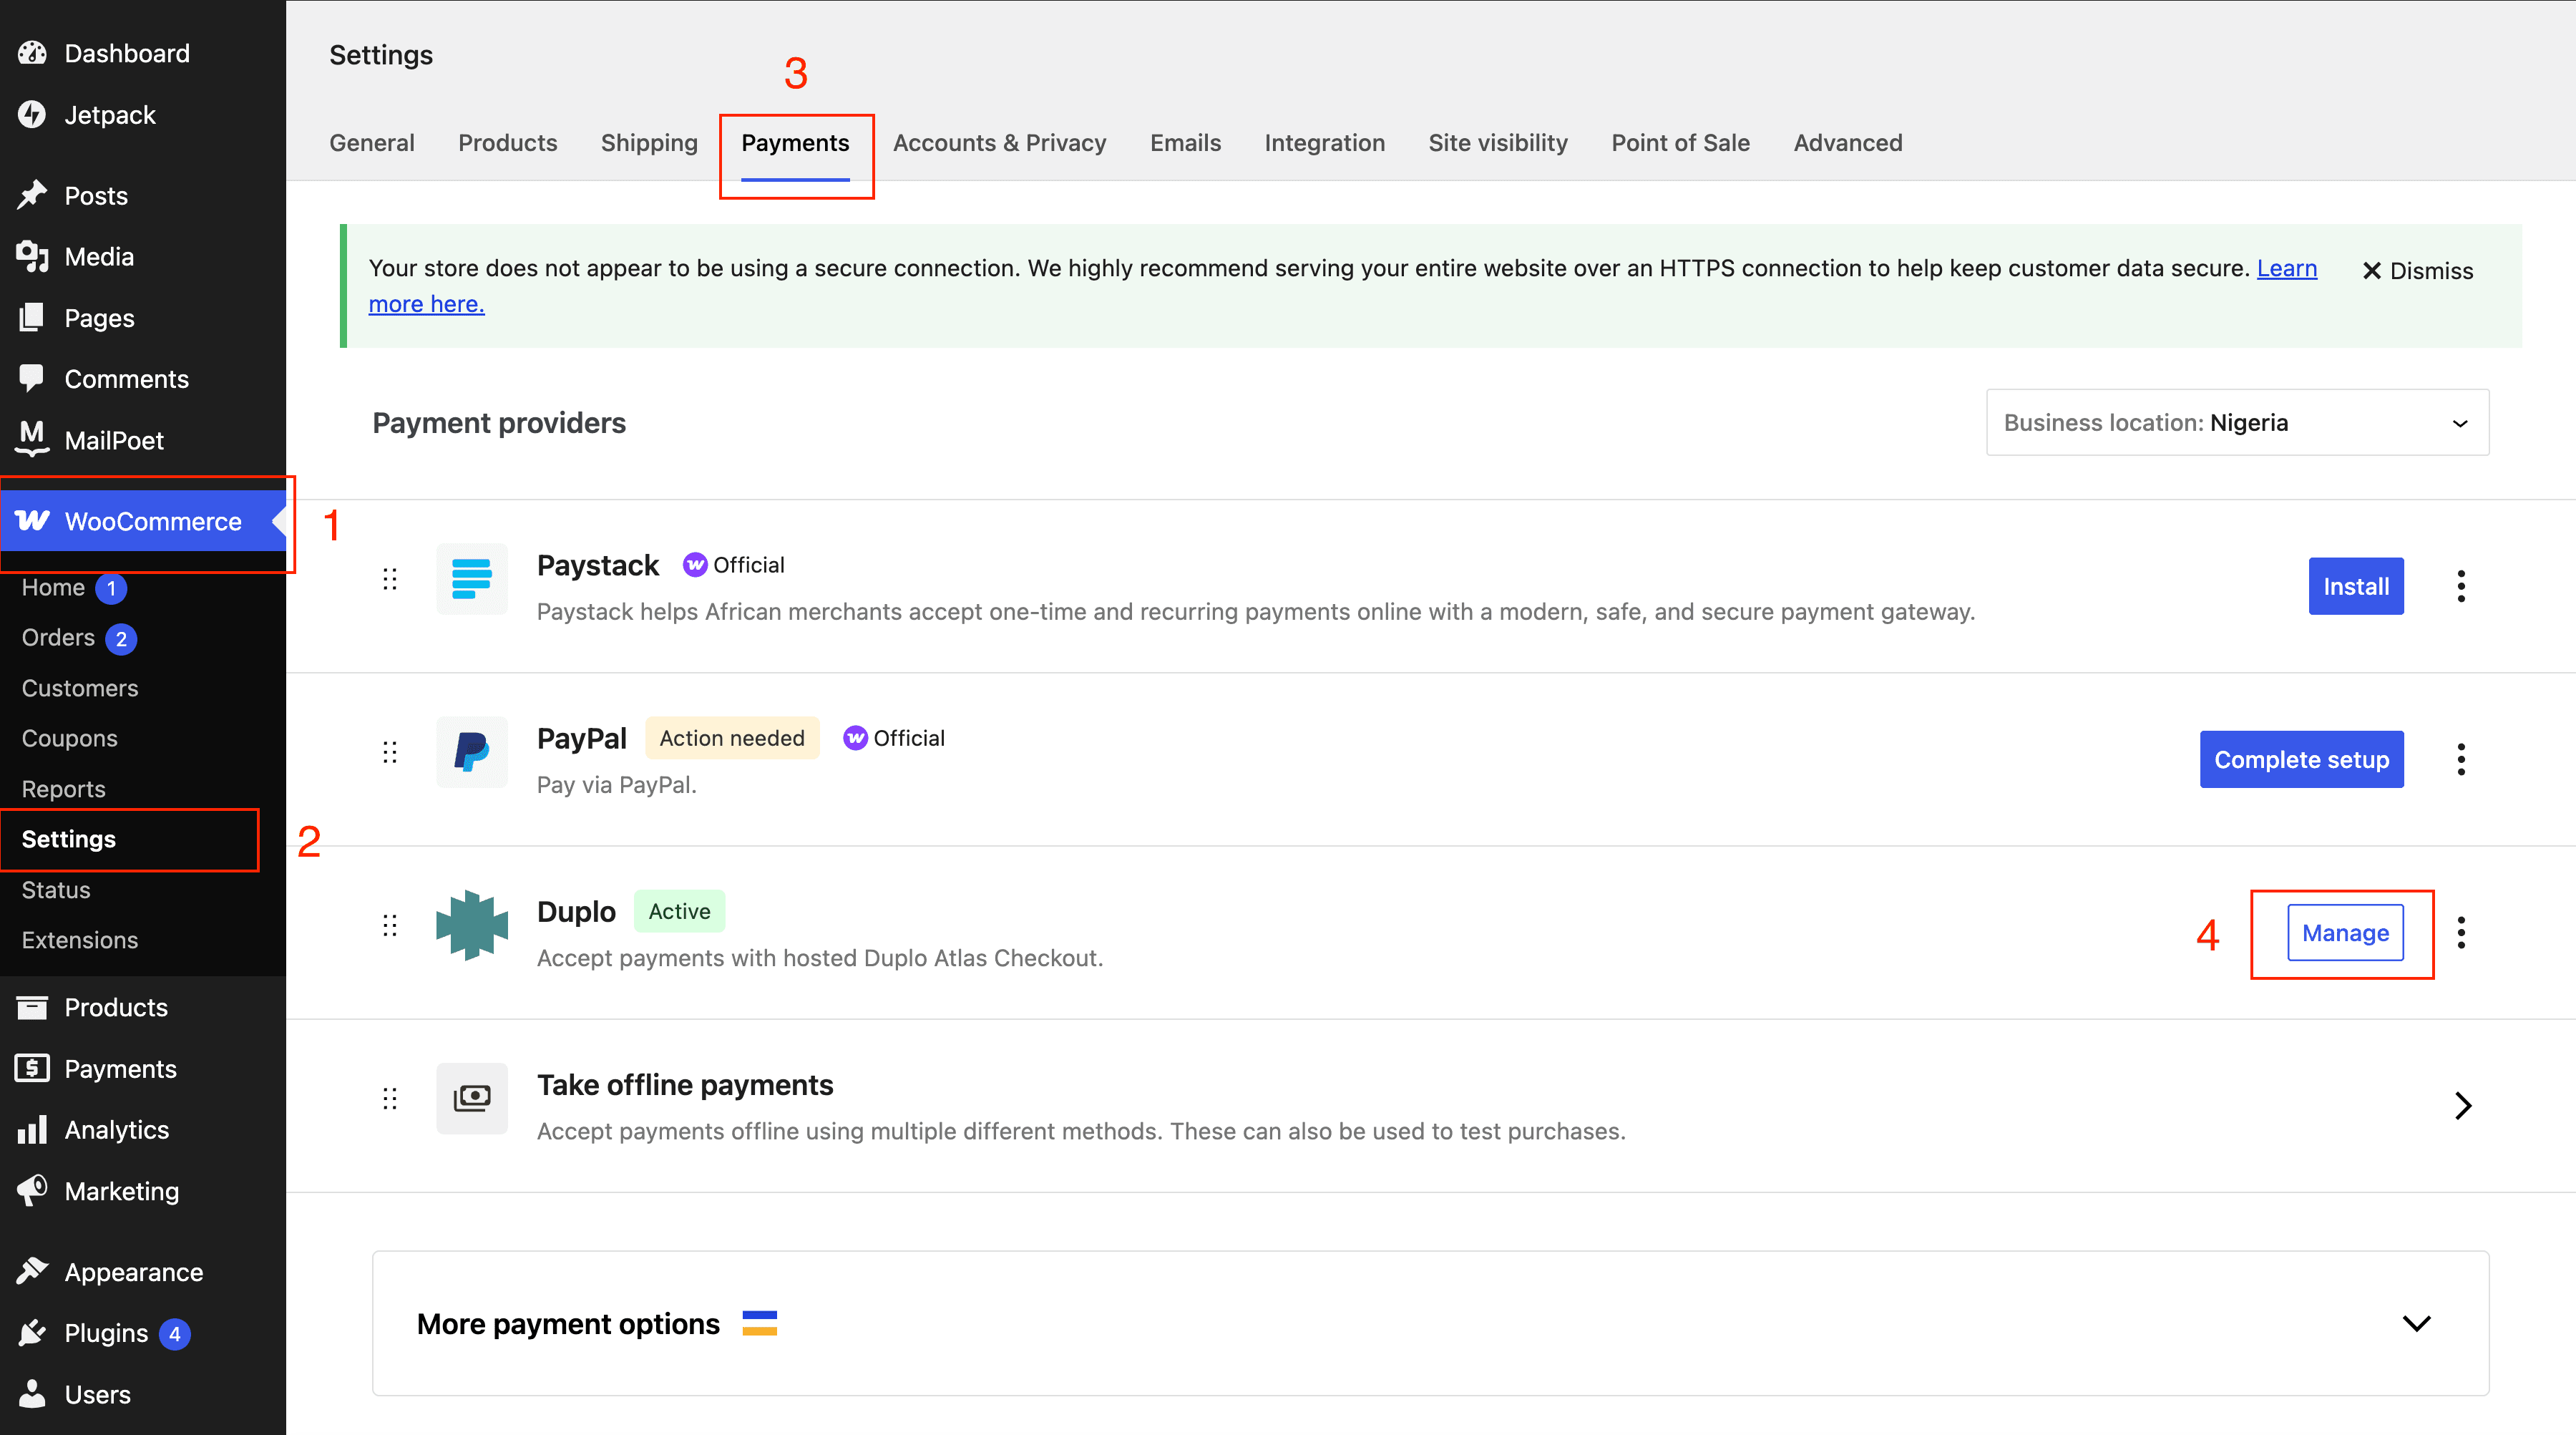
Go to WooCommerce → Settings → Payments, then click Manage on Duplo to open its settings. This is where WooCommerce lists payment methods and where Duplo is configured.
Copy the WooCommerce callback URL shown at the top of the Duplo settings page, and add it as your webhook URL in the Atlas dashboard so Atlas can notify your store when a payment is completed. See Enabling webhooks on Atlas for the steps.
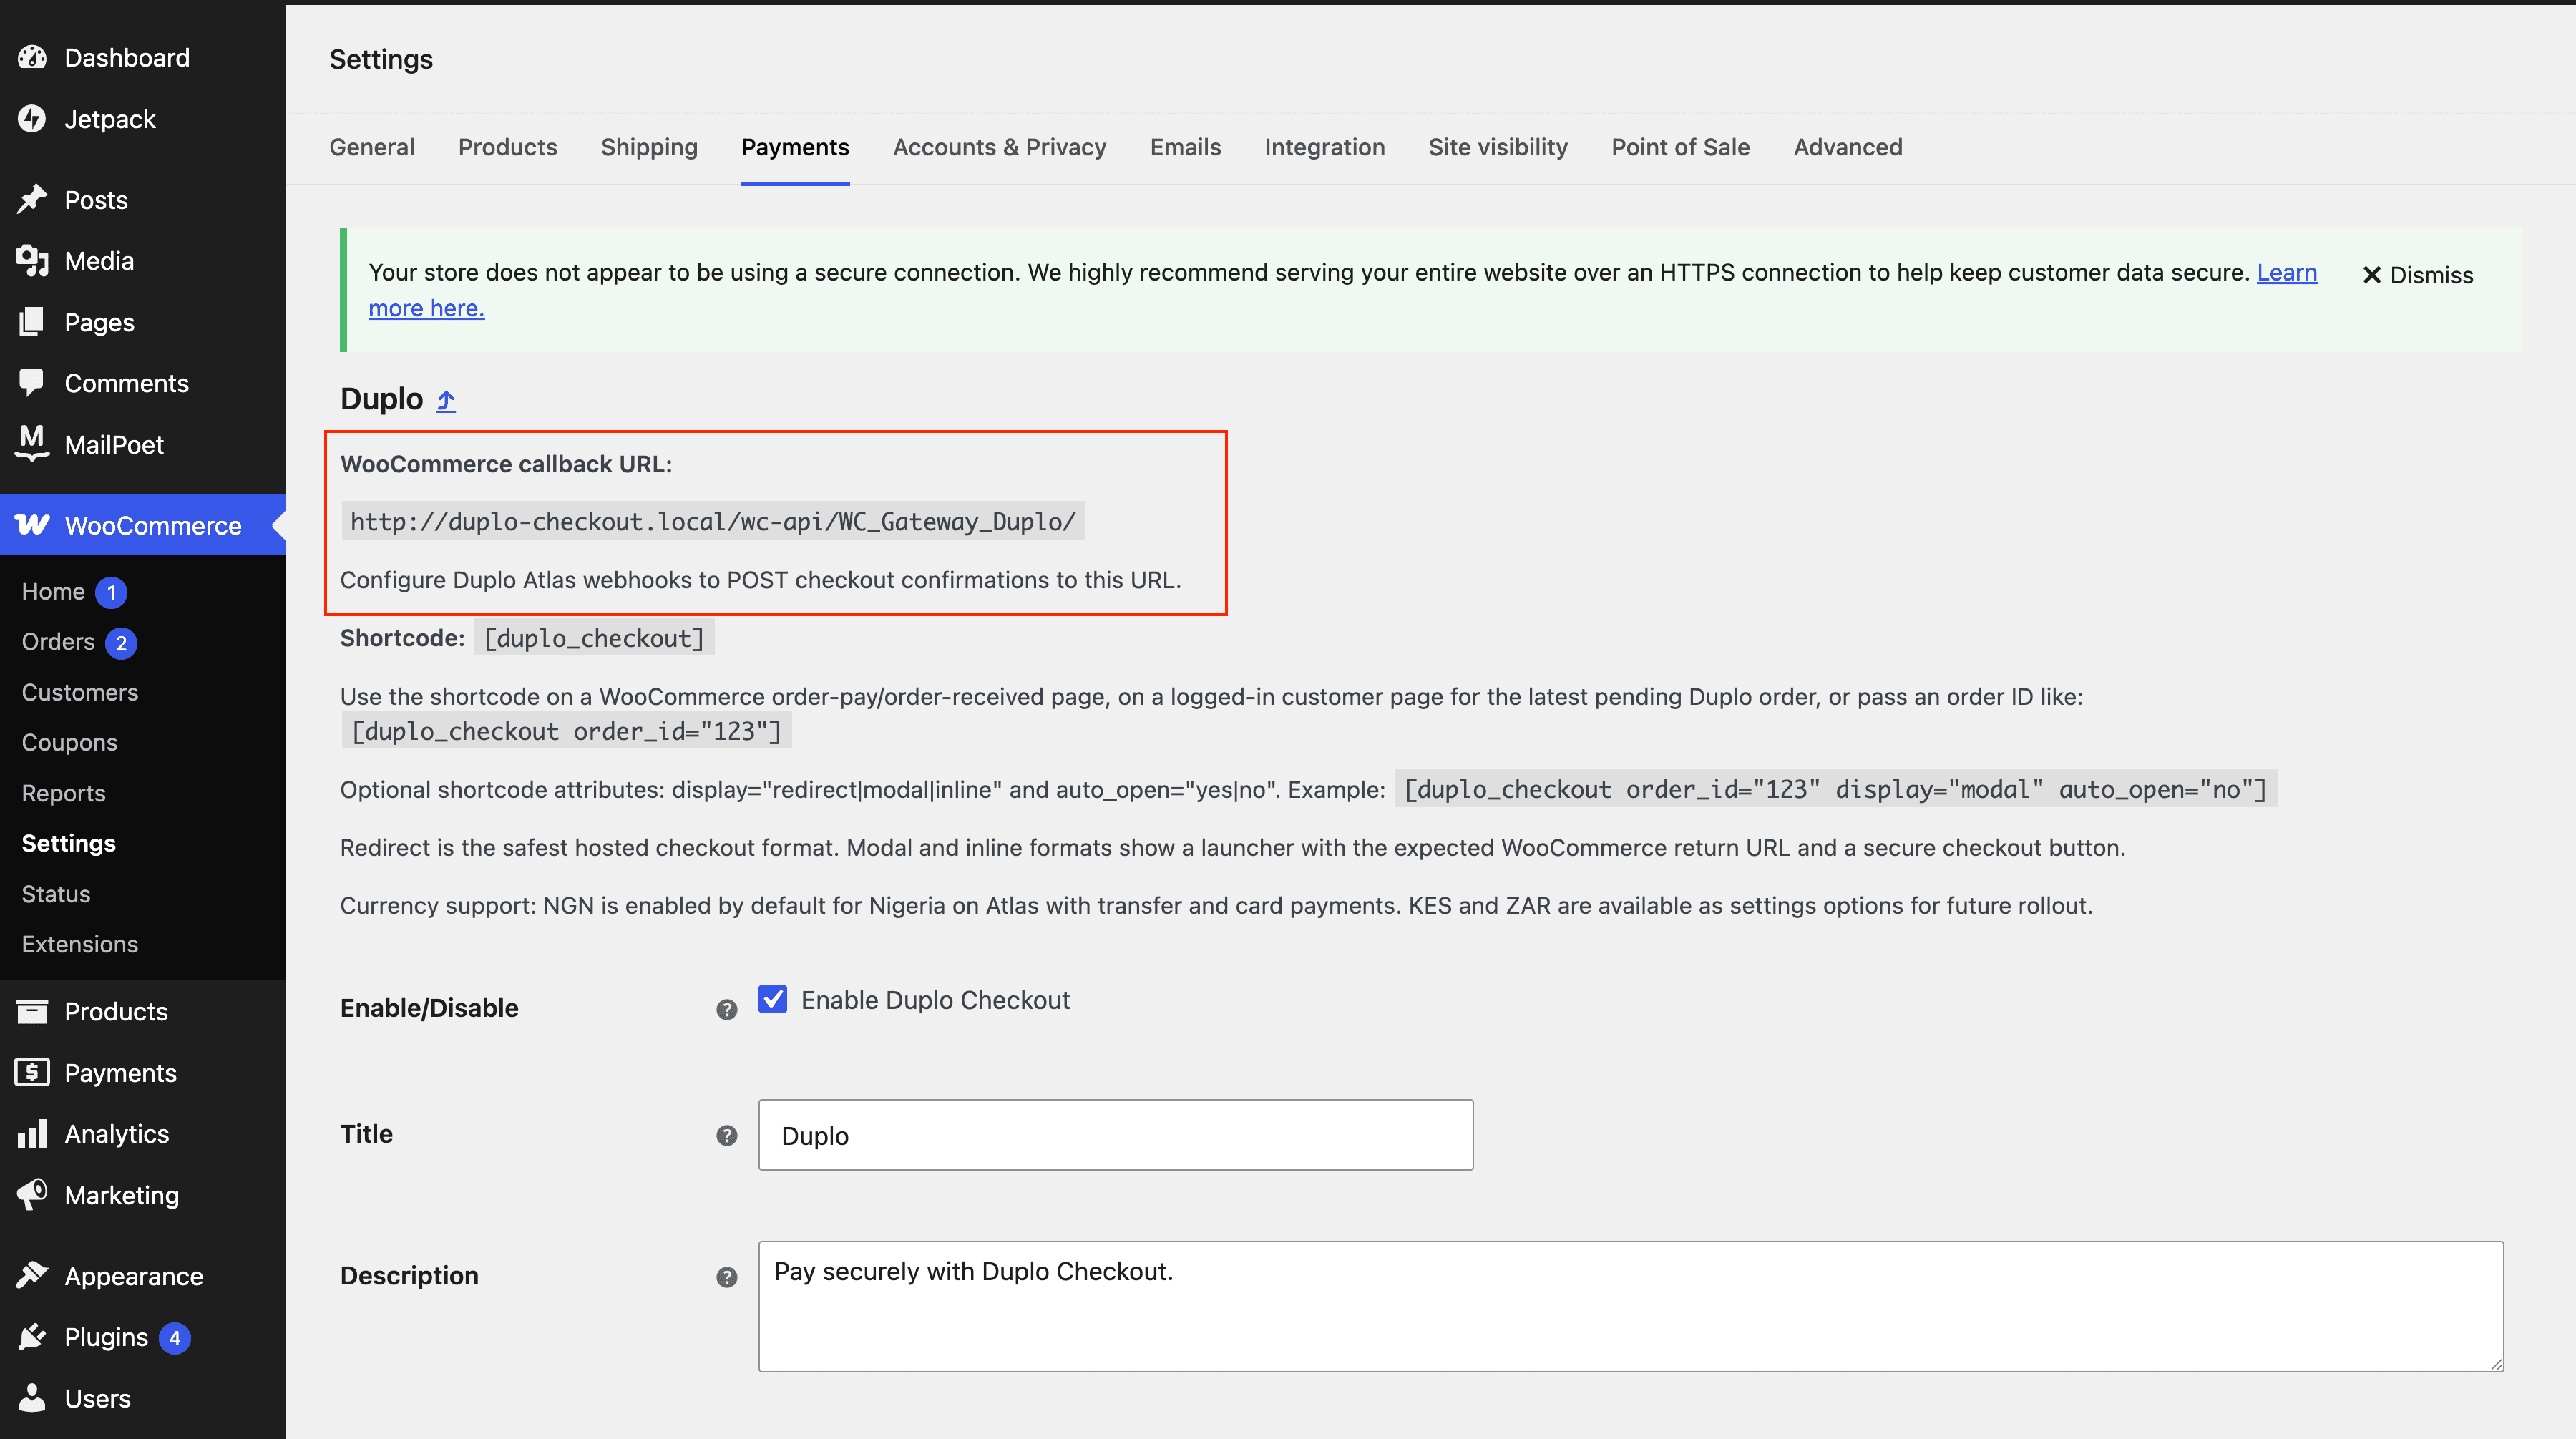
On the Duplo settings page, check Enable Duplo Checkout so it appears as a payment option for your customers.
Enter your Atlas API Key. This authenticates the plugin with your Atlas account so it can create and confirm payments.
Save changes to apply your settings and activate the connection.
Note
Use a test API key while developing and a live key in production. The key you enter determines whether payments run in test or live mode.
Configure checkout
The Duplo settings page controls how the payment method appears and behaves at checkout.
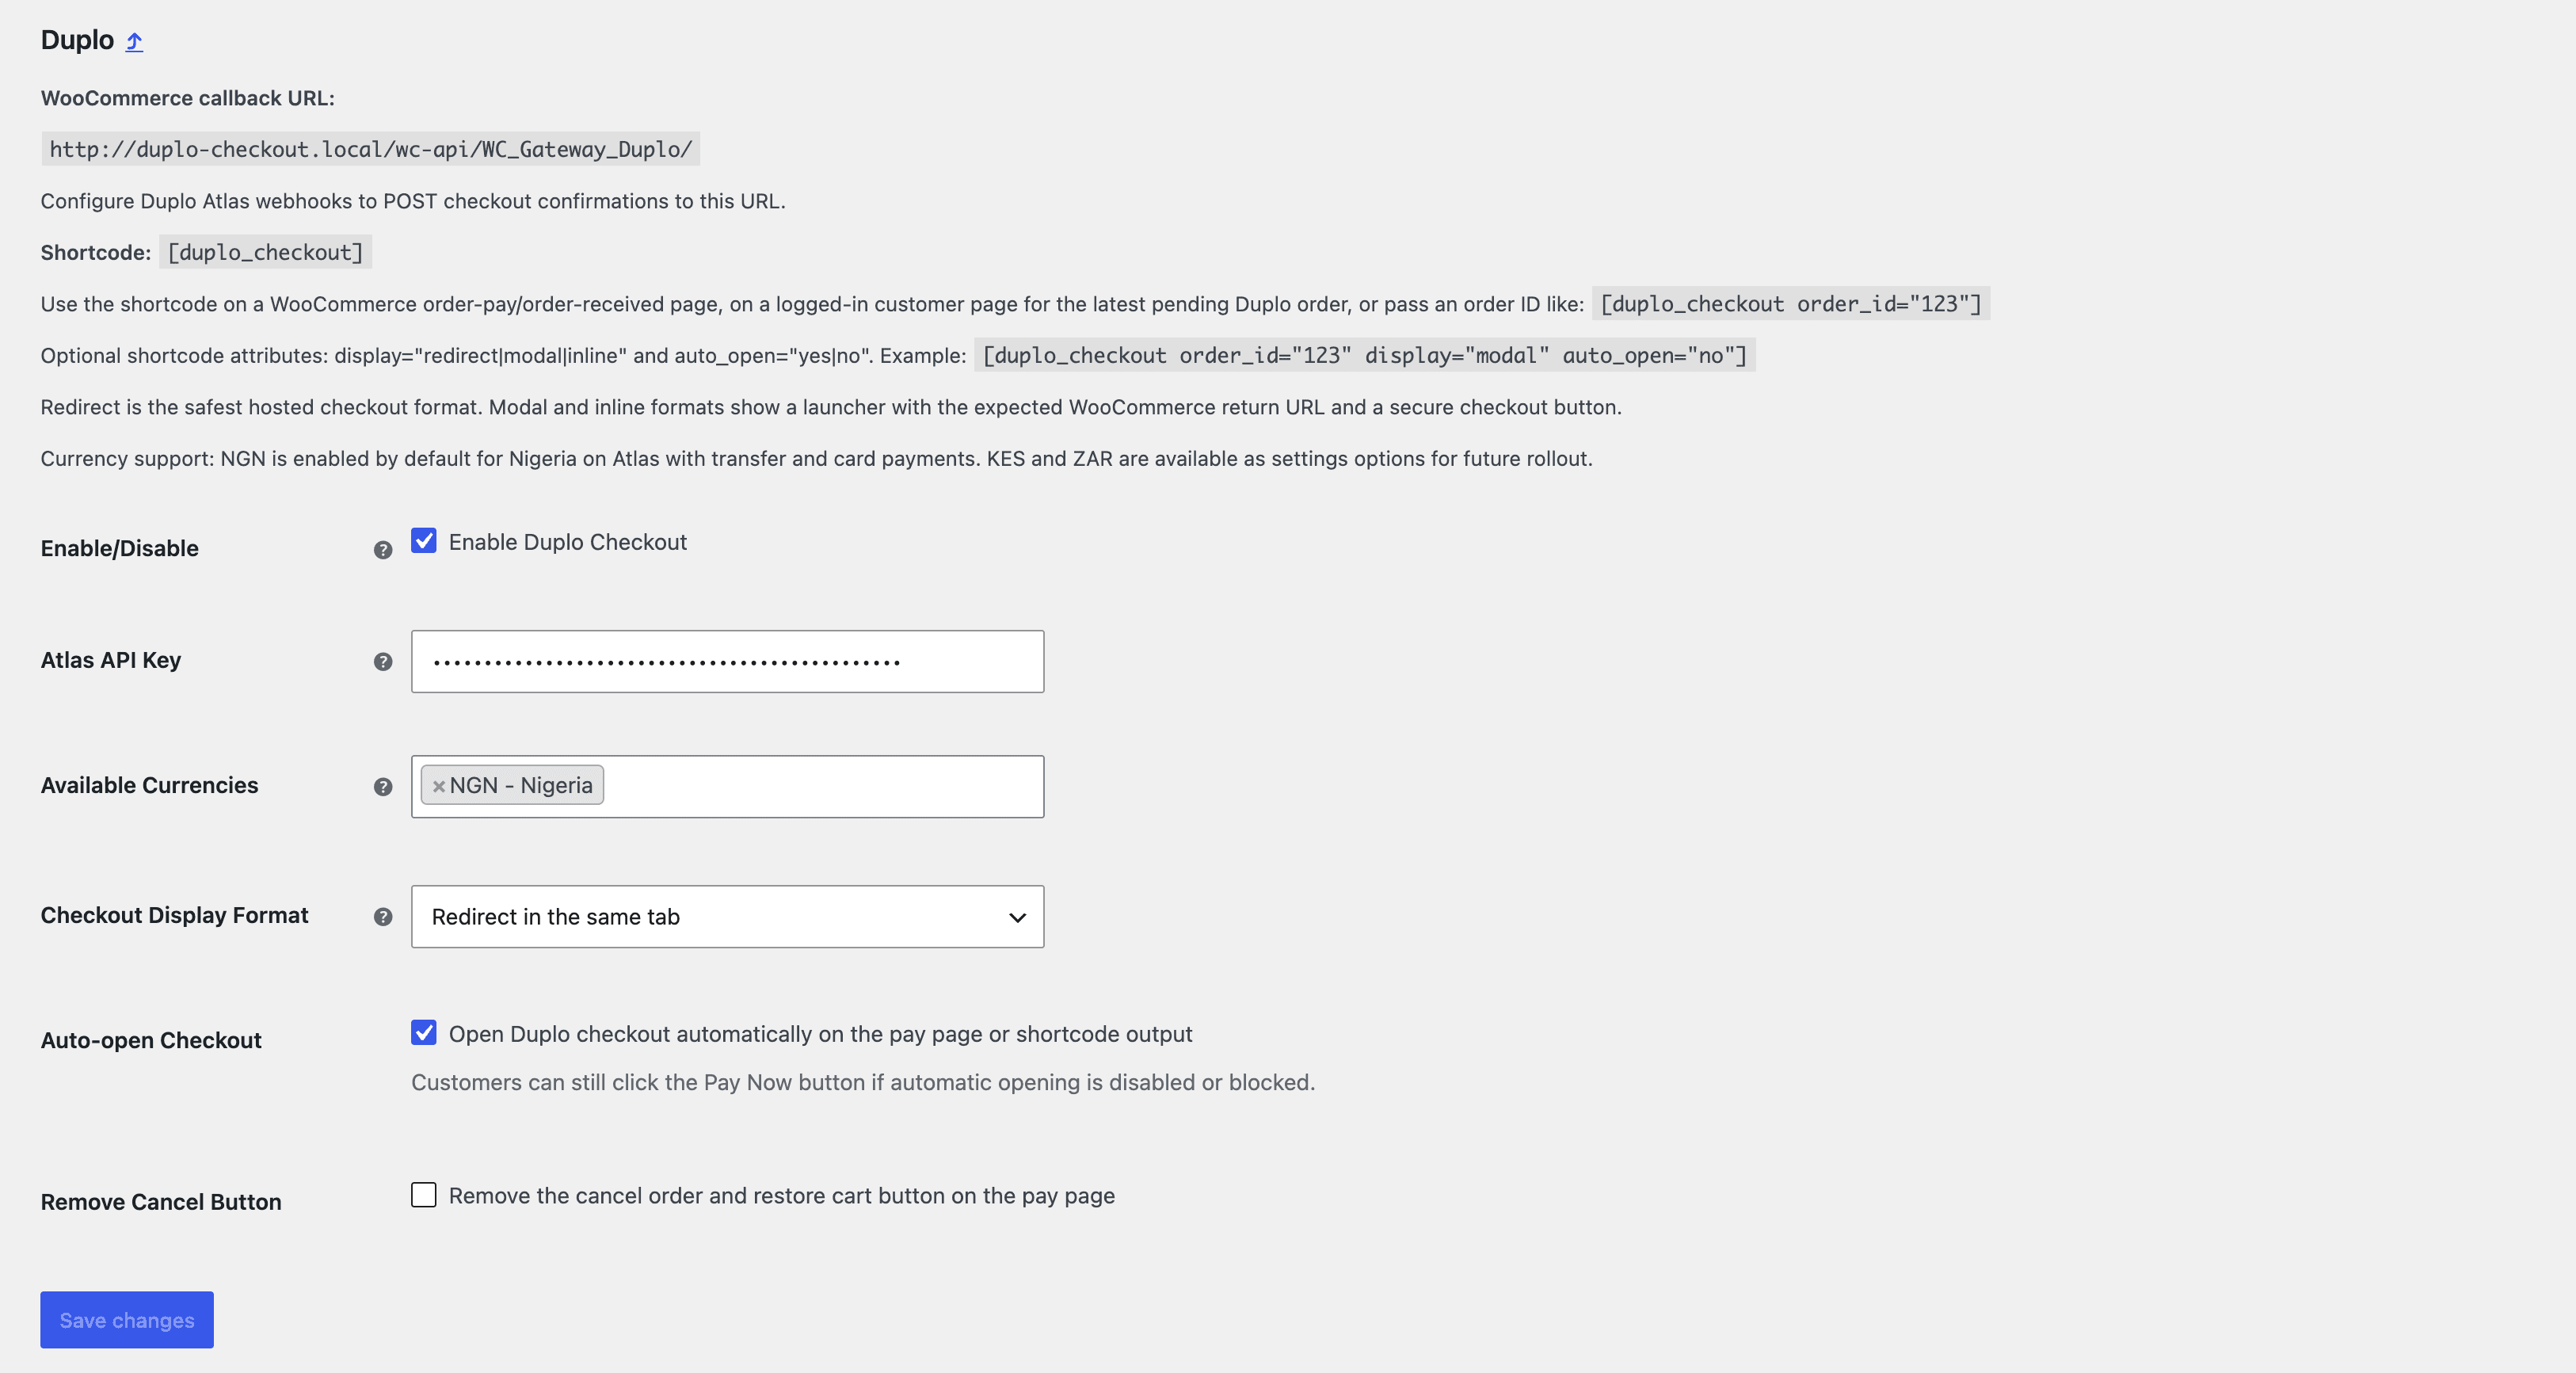
| Setting | Description | Recommended |
|---|---|---|
| Enable Duplo Checkout | Turns the payment method on or off at checkout. | Enabled |
| Atlas API Key | Your Atlas API key, used to authenticate requests to Atlas. | Test key in development, live key in production |
| Available Currencies | The currencies customers can pay in. NGN (Nigeria) is currently supported. | NGN |
| Checkout Display Format | How checkout is presented: redirect (same tab), modal, or inline. | Redirect (same tab) |
| Auto-open Checkout | Opens Duplo checkout automatically on the pay page. Customers can still click Pay Now if it is disabled or blocked. | Enabled |
Note
Redirect is the safest hosted checkout format. Modal and inline formats show a launcher with the expected WooCommerce return URL and a secure checkout button.
Display checkout with a shortcode
By default, the plugin renders checkout on the standard WooCommerce order-pay and order-received pages. You can also place
checkout anywhere with the [duplo_checkout] shortcode.
Use it on a WooCommerce order-pay or order-received page, on a logged-in customer page where it loads the latest pending Duplo order, or pass an order ID directly:
[duplo_checkout order_id="123"]The shortcode accepts these optional attributes:
| Attribute | Values | Description |
|---|---|---|
order_id | A WooCommerce order ID | The order to load checkout for. |
display | redirect, modal, inline | How checkout is presented. |
auto_open | yes, no | Whether checkout opens automatically. |
[duplo_checkout order_id="123" display="modal" auto_open="no"]Test your integration
With a test API key entered and the plugin enabled, place a test order on your store and complete checkout to confirm everything is wired up. See Testing with Test Accounts for test payment details.
Go live
When you are ready to accept real payments:
Replace your test API key with your live key on the Duplo settings page so the plugin processes real payments instead of test-mode ones.
Confirm your webhook is configured for your live account so your store receives confirmations for real orders.
Complete the Go-Live Checklist to make sure your account is cleared to accept live payments.
Related guides
How is this guide?
Last updated on